
Grow a Bountiful Bounty: Your Guide to a Thriving Miniature Root Vegetable Garden in Pots
Harvesting fresh and flavorful root vegetables right from your own space, no garden required? It’s easier than you think! With the right planning and a few simple techniques, you can create a thriving miniature root vegetable garden in pots. Whether you’re a seasoned gardener or just starting out, this guide will provide you with everything you need to know to grow delicious, homegrown root vegetables in your own backyard or balcony.
In this comprehensive guide, we’ll cover all aspects of container gardening for root vegetables, from selecting the ideal pots and soil to planting techniques, watering and fertilizing, companion planting and harvesting. Along the way, you’ll discover tips and tricks for optimizing growth, maximizing yields and troubleshooting common problems.
Get ready to embark on a delightful gardening adventure and enjoy the satisfaction of cultivating your wholesome root vegetable harvest in pots.
1. Get the Right Pots and Soil
When it comes to container gardening for root vegetables, choosing the right pots and soil is essential for their successful growth and bountiful harvests. Let’s delve into the key considerations to ensure optimal conditions for your miniature root vegetable garden:
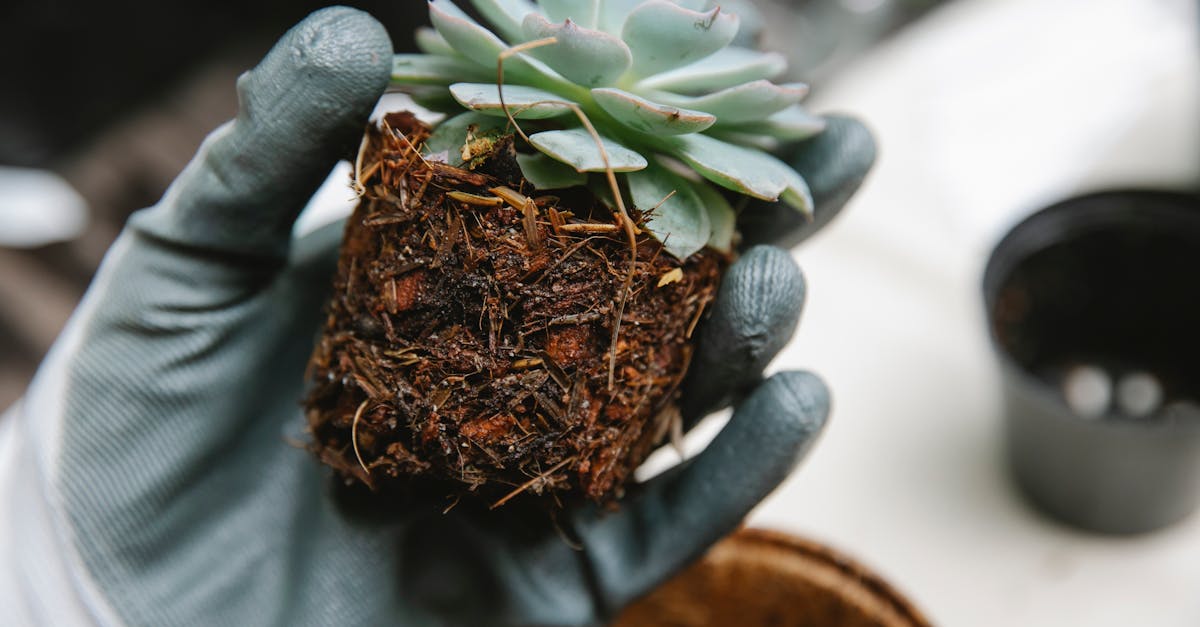
Selecting the Ideal Pots: Opt for pots that are sufficiently large to accommodate the size and shape of the root vegetables you plan to grow. Root vegetables like carrots and parsnips require deeper pots to allow for proper root development. Ensure the pots have adequate drainage holes to prevent waterlogging, which can lead to root rot. Consider materials like terracotta or plastic, which offer breathability and durability. For larger root vegetables, raised garden beds can provide ample space and improved drainage.
Preparing Well-Draining Soil: Root vegetables thrive in loose, well-draining soil that allows for proper aeration and prevents waterlogging. Create a potting mix tailored to their needs by combining garden soil, compost or manure, and perlite or vermiculite. This blend provides a balance of nutrients, organic matter, and drainage. Avoid using heavy, clay-based soils as they tend to compact and restrict root growth. Raised garden beds offer excellent drainage and can be filled with a custom soil mix, giving your root vegetables the best start.
Pot Material and Size
When selecting pots for your miniature root vegetable garden, consider the following factors:
Drainage Holes: Ensure that the pots you choose have adequate drainage holes to prevent waterlogging. Excess water can lead to root rot and hinder the growth of your root vegetables. Drainage holes allow excess water to drain out, promoting proper aeration and root development.
Size and Shape: Choose pots that are large enough to accommodate the size and shape of the root vegetables you plan to grow. Root vegetables like carrots and parsnips require deeper pots to allow for proper root development. Consider the mature size of the root vegetables when selecting the pot size. For example, carrots need a pot depth of at least 12 inches, while radishes can thrive in shallower pots.
Material: The material of the pot also plays a role in the growth of your root vegetables. Terracotta pots are porous, allowing for good aeration and drainage. However, they can dry out quickly, so you may need to water more frequently. Plastic pots are lightweight and retain moisture well, but they can become waterlogged if not properly drained.
Soil Preparation
Organic Matter and Fertilizers
Enhancing the fertility of the soil is essential for the healthy growth and development of root vegetables. Here’s how you can incorporate organic matter and fertilizers into your soil mix:
Benefits of Organic Matter: Incorporating organic matter, such as compost or manure, into the soil provides numerous benefits for root vegetables. Organic matter improves soil structure by increasing aeration and drainage, which promotes healthy root growth. It also enhances the soil’s water retention capacity, reducing the frequency of watering. Additionally, organic matter is a rich source of nutrients that are essential for plant growth, including nitrogen, phosphorus, and potassium.
Types of Organic Matter: There are various types of organic matter that you can add to your soil, including compost, manure, and peat moss. Compost is a mixture of decomposed organic materials, such as food scraps, leaves, and grass clippings. Manure is the waste product of animals, such as cows, horses, and chickens. Peat moss is a partially decomposed sphagnum moss that is often used to improve soil moisture retention. Choose the type of organic matter that is most readily available to you and phù hợp with your gardening practices.
Fertilizers: In addition to organic matter, you may also need to add fertilizers to the soil to provide additional nutrients for your root vegetables. Fertilizers come in various forms, including granular, liquid, and slow-release. Choose a fertilizer that is specifically formulated for root vegetables and follow the application instructions carefully. Avoid over-fertilizing, as this can harm the plants.
2. Choose Compatible Root Vegetables
When selecting root vegetables for your miniature garden, consider choosing varieties that have similar growing conditions and companion planting benefits. Here are a few things to keep in mind:
Similar Growing Conditions: Choose root vegetables that have similar soil, water, and sunlight requirements. For example, carrots, radishes, and beets all prefer well-drained soil, regular watering, and full sun. Grouping vegetables with similar needs makes it easier to care for them and ensures that they all thrive.
Companion Planting: Companion planting is the practice of planting different species of plants together to create mutually beneficial relationships. Some companion plants can help to improve growth, deter pests, or attract pollinators. For example, planting carrots next to onions can help to deter carrot flies, while planting radishes next to lettuce can help to improve the growth of both vegetables.
Space Requirements: Consider the mature size of the root vegetables you choose and space them accordingly. Overcrowding can lead to stunted growth and competition for resources. For example, carrots need a spacing of 2-3 inches between plants, while beets require a spacing of 4-6 inches.
Popular Root Vegetables for Pots
When selecting root vegetables for your miniature container garden, consider these popular and easy-to-grow varieties:
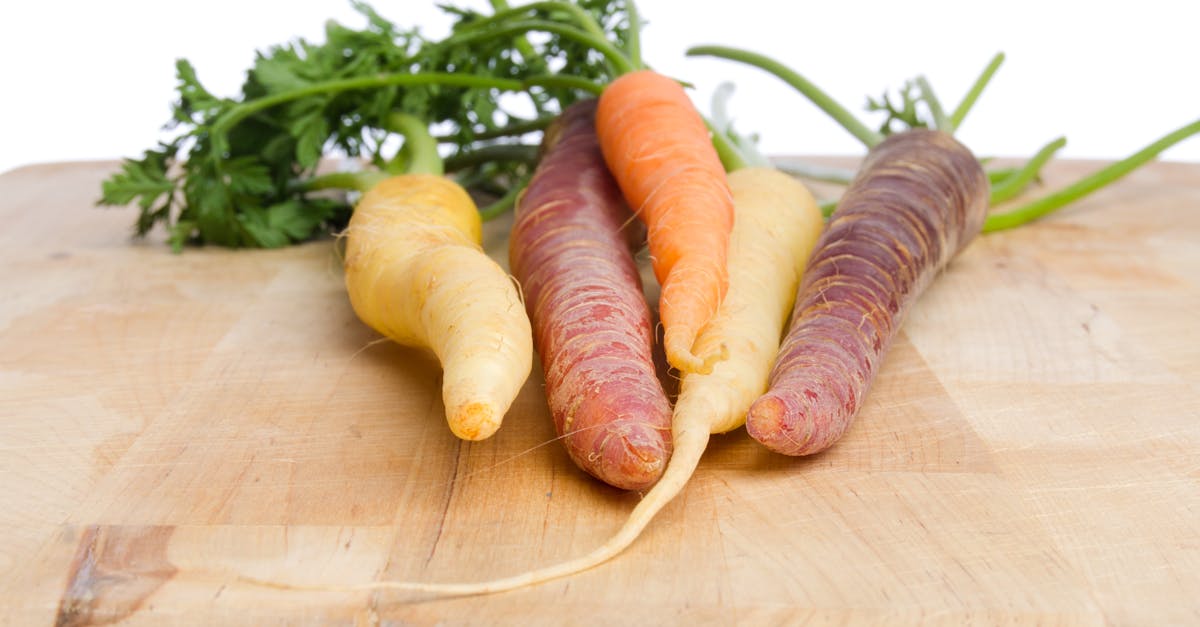
Carrots: Carrots are a classic root vegetable that is well-suited to container gardening. They require a deep pot with well-drained soil. Choose varieties that are specifically bred for container growing, as they tend to have shorter roots.
Radishes: Radishes are a fast-growing root vegetable that can be harvested in as little as 3 weeks. They are a good choice for beginner gardeners as they are easy to grow and tolerate a wide range of conditions. Radishes can be grown in shallower pots than carrots.
Beets: Beets are a colorful and nutritious root vegetable that is also well-suited to container gardening. They prefer cool weather and well-drained soil. Choose varieties that are compact and have a shorter maturity time for контейнерное выращивание.
Turnips: Turnips are a versatile root vegetable that can be eaten both raw and cooked. They are a good source of vitamins and minerals. Turnips prefer cool weather and well-drained soil. Choose varieties that are suitable for container growing, as some varieties can grow quite large.
Parsnips: Parsnips are a sweet and flavorful root vegetable that is related to carrots. They require a deep pot with well-drained soil. Parsnips have a longer growing season than other root vegetables, so it is important to start them early indoors or purchase transplants.
Companion Planting
Companion planting is a natural and effective way to improve the growth and health of your root vegetables. By planting compatible species together, you can create a mutually beneficial ecosystem in your miniature garden. Here are a few companion planting strategies to consider:
Pest Control: Some companion plants can help to deter pests from your root vegetables. For example, planting onions or garlic near your carrots can help to keep carrot flies away. Planting nasturtiums near your radishes can help to deter aphids. And planting marigolds near your beets can help to repel nematodes.
Improved Growth: Certain companion plants can help to improve the growth and yield of your root vegetables. For example, planting lettuce or spinach near your carrots can help to improve the growth of both vegetables. Planting beans or peas near your beets can help to fix nitrogen in the soil, which benefits the beets. And planting tomatoes near your parsnips can help to improve the flavor of the parsnips.
Space Utilization: Companion planting can also help you to make the most of the space in your miniature garden. By planting vertically or intercropping, you can grow more plants in a smaller area. For example, you can plant radishes or lettuce between rows of carrots or beets. Or you can plant beans or peas on a trellis above your root vegetables.
3. Planting Techniques for Root Vegetables
To ensure optimal root development and prevent overcrowding, follow these planting techniques for root vegetables in pots:
Seed Depth and Spacing: When planting root vegetable seeds, it is important to follow the recommended planting depth and spacing for each variety. Planting seeds too deeply can prevent germination, while planting them too shallow can result in poor root development. The recommended planting depth and spacing can be found on the seed packet or in a gardening book. As a general rule, root vegetable seeds should be planted at a depth of 1/4 to 1/2 inch below the soil surface. The spacing between seeds will vary depending on the variety, but a good rule of thumb is to space them 2-3 inches apart.
Thinning Seedlings: Once the seedlings have emerged, you will need to thin them out to ensure that they have enough space to grow. To thin seedlings, simply remove the weaker or smaller seedlings, leaving the strongest seedlings behind. The recommended spacing between seedlings can be found on the seed packet or in a gardening book. Thinning seedlings can be done by hand or with a pair of scissors.
Succession Planting: Succession planting is a technique that can be used to extend the harvest period of your root vegetables. To succession plant, simply plant seeds of the same variety every few weeks. This will ensure that you have a continuous supply of fresh root vegetables throughout the growing season.
Seed Depth and Spacing
When planting root vegetable seeds, it is important to follow the recommended planting depth and spacing guidelines for each variety. Planting seeds too deeply can prevent germination, while planting them too shallow can result in poor root development. Overcrowding can also lead to stunted growth and competition for resources. Here are some tips for determining the correct planting depth and spacing for root vegetables:
Planting Depth: The recommended planting depth for root vegetable seeds can be found on the seed packet or in a gardening book. As a general rule, root vegetable seeds should be planted at a depth of 1/4 to 1/2 inch below the soil surface. Some root vegetables, such as carrots and parsnips, have very small seeds that should be barely covered with soil. Other root vegetables, such as beets and turnips, have larger seeds that can be planted at a depth of 1/2 inch.
Spacing: The spacing between root vegetable seeds will vary depending on the variety. The recommended spacing can be found on the seed packet or in a gardening book. As a general rule, root vegetables should be spaced 2-3 inches apart. This spacing will give the seedlings enough room to grow and develop properly. If the seedlings are planted too close together, they will compete for resources and may become stunted. Thinning seedlings to the correct spacing is essential for optimal growth and yield.
Seed Tape: Seed tape can be a helpful tool for planting root vegetable seeds at the correct depth and spacing. Seed tape is a biodegradable paper tape that has seeds evenly spaced along its length. To use seed tape, simply lay the tape in a shallow trench and cover it with soil. The seed tape will dissolve in the soil, leaving the seeds at the correct depth and spacing.
Thinning Seedlings
Thinning seedlings is an important step in the gardening process that helps to ensure healthy growth and development of your plants. When seedlings are overcrowded, they compete for resources such as sunlight, water, and nutrients. This can lead to stunted growth, weak plants, and reduced yields. Thinning seedlings allows the strongest and healthiest plants to thrive, resulting in a more productive and vigorous garden.
How to Thin Seedlings: Thinning seedlings is a simple process that can be done by hand or with a pair of scissors. To thin seedlings by hand, gently grasp the base of the weakest or smallest seedlings and pull them straight up. Be careful not to damage the roots of the remaining seedlings. To thin seedlings with scissors, simply cut the stem of the unwanted seedling close to the soil surface. When thinning seedlings, it is important to space the remaining seedlings according to the recommended spacing for the variety. This spacing will give the seedlings enough room to grow and develop properly.
When to Thin Seedlings: The best time to thin seedlings is when they are young and have developed their first set of true leaves. True leaves are the second set of leaves that emerge from the seedling, and they are typically larger and more deeply lobed than the first set of leaves (cotyledons). Thinning seedlings at this stage allows the remaining seedlings to establish a strong root system and begin to grow more vigorously.
Succession Planting
Watering and fertilizing are essential for the successful growth and development of root vegetables grown in containers. Here are some key considerations:
Watering Techniques: Root vegetables require consistent moisture, but it’s important to avoid overwatering, as this can lead to root rot. The best way to water root vegetables is to check the soil moisture regularly and water only when the soil feels dry to the touch. You can use your finger or a moisture meter to check the soil moisture. Water deeply and evenly, allowing the water to penetrate all the way to the bottom of the pot. Avoid getting the foliage wet, as this can promote disease.
Fertilizing Schedule: Fertilizing provides essential nutrients for root vegetable growth. Choose a balanced fertilizer that is specifically formulated for root vegetables. Follow the instructions on the fertilizer package carefully and avoid over-fertilizing, as this can damage the plants. Fertilize regularly throughout the growing season, especially during periods of rapid growth. Organic fertilizers, such as compost or manure, can also be used to provide nutrients and improve soil health.
4. Watering and Fertilizing
Watering and fertilizing are essential for the successful growth and development of root vegetables grown in containers. Here are some key considerations:
Watering Techniques: Root vegetables require consistent moisture, but it’s important to avoid overwatering, as this can lead to root rot. The best way to water root vegetables is to check the soil moisture regularly and water only when the soil feels dry to the touch. You can use your finger or a moisture meter to check the soil moisture. Water deeply and evenly, allowing the water to penetrate all the way to the bottom of the pot. Avoid getting the foliage wet, as this can promote disease.
Fertilizing Schedule: Fertilizing provides essential nutrients for root vegetable growth. Choose a balanced fertilizer that is specifically formulated for root vegetables. Follow the instructions on the fertilizer package carefully and avoid over-fertilizing, as this can damage the plants. Fertilize regularly throughout the growing season, especially during periods of rapid growth. Organic fertilizers, such as compost or manure, can also be used to provide nutrients and improve soil health.
Watering Techniques
Watering is a critical aspect of growing root vegetables in containers. Maintaining consistent soil moisture without overwatering is essential for their healthy growth and development. Here are a few watering techniques to consider:
Finger Test: The finger test is a simple and effective way to check soil moisture. Insert your finger into the soil up to the first knuckle. If the soil feels dry or slightly moist, it’s time to water. Avoid watering if the soil feels wet or muddy.
Moisture Meters: Moisture meters are devices that can accurately measure soil moisture levels. They are easy to use and can provide a more precise indication of when to water. Insert the moisture meter into the soil and read the moisture level on the display.
Other Indicators: In addition to the finger test and moisture meters, you can also observe the plants themselves for signs of moisture stress. Wilting leaves or yellowing foliage can indicate that the plants need water. Overwatered plants may show signs of yellowing leaves or stunted growth.
Fertilizing Schedule
Fertilizing is essential for providing root vegetables with the nutrients they need to grow and develop properly. Here’s how to create a balanced fertilizing schedule:
Growth Stages: Different growth stages of root vegetables require different nutrient ratios. During the early stages of growth, nitrogen is essential for leaf development. As the roots begin to develop, phosphorus and potassium become more important. Consider using a fertilizer that is specifically formulated for root vegetables and provides a balanced blend of nutrients throughout the growing season.
Organic vs. Slow-Release Fertilizers: Organic fertilizers, such as compost or manure, release nutrients slowly over time. They can help improve soil health and provide a steady supply of nutrients to the plants. Slow-release fertilizers are also a good option, as they release nutrients gradually over several weeks or months. Choose a fertilizer that is appropriate for the size and type of containers you are using and follow the instructions on the package carefully to avoid over-fertilizing.
Frequency: Fertilize root vegetables every 3-4 weeks throughout the growing season. During periods of rapid growth, you may need to fertilize more frequently. Avoid fertilizing in the fall or winter, as this can encourage new growth that may be damaged by frost.
5. Harvesting and Storing
Harvesting and storing root vegetables at the right time is crucial to maintain their freshness and quality. Here’s how to do it:
Harvesting Signs: Different types of root vegetables have different maturity times. In general, root vegetables are ready to harvest when they reach their full size and the tops start to turn yellow or brown. Here are some specific signs for common root vegetables: – Carrots: The tops will start to turn yellow or bronze, and the roots will be firm and bright orange. – Radishes: The roots will be firm and round, and the tops will be deep green. – Beets: The roots will be firm and deep red, and the tops will be large and leafy. – Turnips: The roots will be firm and white or purple, and the tops will be green and leafy. – Parsnips: The roots will be long and white or cream-colored, and the tops will be dark green and feathery.
Storage Methods: Proper storage is essential to maintain the quality and freshness of harvested root vegetables. Here are a few common storage methods: – Refrigeration: Most root vegetables can be stored in the refrigerator for several weeks. Wrap them loosely in a damp paper towel or place them in a plastic bag with a few holes for ventilation. – Root Cellars: Root cellars provide ideal conditions for storing root vegetables. They are cool, dark, and humid. If you have a root cellar, place the root vegetables in bins or crates and cover them with a layer of sand or sawdust. – Sand Storage: Sand storage is another effective method for storing root vegetables. Fill a container with slightly damp sand and bury the root vegetables in the sand, leaving the tops exposed.
Harvesting Signs
Harvesting root vegetables at the right time is essential to ensure their optimal flavor and nutritional value. Here are some key signs of maturity and readiness to look for when harvesting different types of root vegetables:
Carrots: Carrots are ready to harvest when they reach their full size and the tops start to turn yellow or bronze. The roots should be firm and bright orange. To test for maturity, gently pull on the top of the carrot. If it comes out easily, the carrot is ready to harvest.
Radishes: Radishes are ready to harvest when the roots are firm and round, and the tops are deep green. Avoid overwatering radishes, as this can lead to cracking or splitting. To test for maturity, gently squeeze the radish. If it feels firm, it is ready to harvest.
Beets: Beets are ready to harvest when the roots are firm and deep red, and the tops are large and leafy. Avoid harvesting beets too early, as the roots will be small and tough. To test for maturity, gently pull on the top of the beet. If it comes out easily, the beet is ready to harvest.
Storage Methods
Proper storage is essential to maintain the freshness and quality of harvested root vegetables. Here are some common storage methods:
Refrigeration: Most root vegetables can be stored in the refrigerator for several weeks. Wrap them loosely in a damp paper towel or place them in a plastic bag with a few holes for ventilation. This method is best for short-term storage and is suitable for root vegetables that are not fully mature or have been damaged.
Root Cellars: Root cellars provide ideal conditions for storing root vegetables. They are cool, dark, and humid. If you have a root cellar, place the root vegetables in bins or crates and cover them with a layer of sand or sawdust. This method can extend the storage life of root vegetables for several months.
Sand Storage: Sand storage is another effective method for storing root vegetables. Fill a container with slightly damp sand and bury the root vegetables in the sand, leaving the tops exposed. This method helps to prevent moisture loss and can extend the storage life of root vegetables for several months.
Quiz
1. Which of the following is NOT a benefit of companion planting for root vegetables?
(a) Pest control (b) Improved growth (c) Increased yield (d) Reduced watering needs
2. True or False: Root vegetable seeds should be planted deep in the soil.
3. Which of the following is a sign that a carrot is ready to harvest?
(a) The tops turn yellow or bronze (b) The roots are firm and bright orange (c) The leaves start to wilt (d) Both (a) and (b)
4. What is the best way to store root vegetables in the refrigerator?
(a) In a sealed plastic bag (b) Wrapped in a damp paper towel (c) In a bowl of water (d) In a freezer bag
5. True or False: Sand storage is the best method for storing all types of root vegetables.
Answer Key
- (d)
- False
- (d)
- (b)
- False
Vertical Gardens and Culinary Delights: Maximizing Yield in Limited Spaces Unlocking the Bounty in Small Spaces: Embracing Container Gardening Imagine Read more
Edible Delights on Your Balcony: A Guide to Growing and Enjoying Edible Flowers In recent years, edible flower gardening has Read more
Balcony Tomato Gardening: A Guide to Growing a Plentiful Harvest in Limited Space Growing tomatoes on a balcony can be Read more
Water-Wise Balcony Gardening: A Path to Sustainable Urban Agriculture Mastering the Art of Water Conservation: A Comprehensive Guide to Optimizing Read more